Devour

YouTube is great as is Vimeo and all the other video sites on the web, but finding the good stuff in amongst the dross isn’t easy. For example, 25 hours of video is uploaded to YouTube every minute so what chance have you got? That’s where Devour steps in. They hand pick what they class as the best videos of the day and link to them from their site.

The site is simple to use – visit, click on a screenshot and watch the video. Customisation is limited in that you can change the background although in future you can tweak the layout to support lists or a full screen grid. All video’s selected are in HD too. This was an instant bookmark for me, not only on my desktop, but on the iPad and iPhone as all video’s work on iOS devices too. Awesome.

Readability

I read much of my web content in Google reader. However for an interesting or longer article I still prefer to click through to the articles website and read it in situ, mostly to read through any associated comments or make my own. More and more sites though are cluttered with links to other articles, tag clouds and adverts. Especially adverts that flash, move and distract from the actual article content. Step forward Readability. A summarised on their website:

Readability is a simple tool that makes reading on the Web more enjoyable by removing the clutter around what you are reading.

To setup Readability, visit the website and select a Style, Size and Margin. Then drag the bookmarklet to your browser bar. When your on a website and the clutter is distracting click on Readability. Take this TUAW article for example.
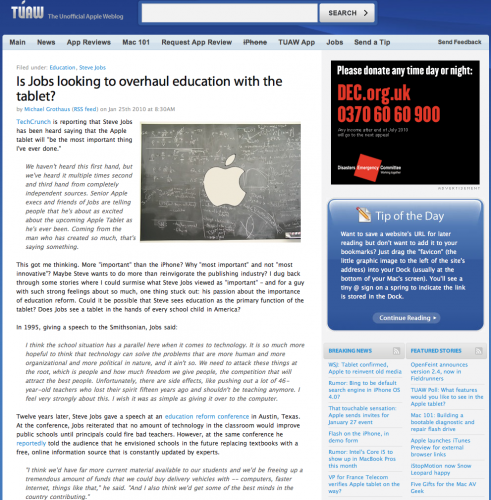
Small text, distractions in the right hand column. One click with Readability and it’s clutter be gone.
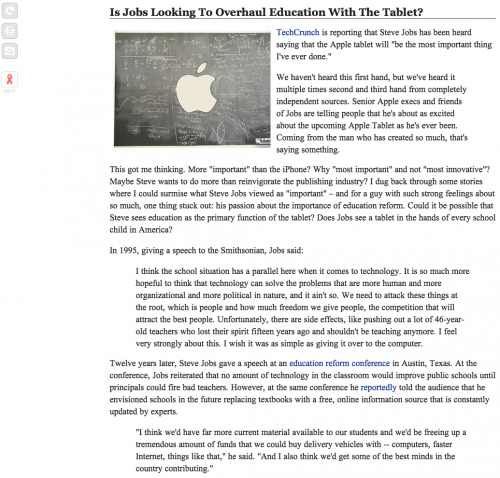
I now have a clear distraction free article with images preserved. Much easier to read. The buttons to the left hand side allow me to swap back to the true website view of the article, and taking advantage of the cleaner page, I can print the article or e-mail the article on to friends and colleagues without the normal distracting content being e-mailed at the same time.

Another use of Readability is when it comes to note taking. I capture a lot of web content in Evernote for future reference. By default the snippet tool can capture a whole page or selected text. I prefer to use a bookmarklet that first sets up a Readability view of a web page and then invokes the Evernote web clipper to capture the article and sync it to my Evernote account. The result is a far cleaner set of notes.
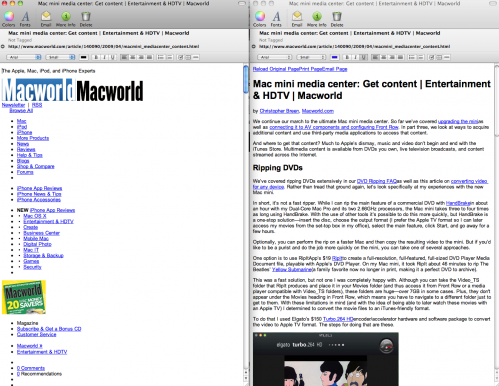
If you want a bookmarklet to do both then take a look at this Evernote forum post. I hope you find Readability as useful as I do – certainly makes for a more readable web.

Dterm

One of the great things about Mac OS X from the Geek perspective, is the Terminal.app.  It’s a simple Command Line Interface that exposes the Unix like operating system underpinning the glorious eye candy which Apple are more famous for.

Your mac works perfectly well without you knowing a gnats dropping about the terminal, and Mac users unfamiliar with  *nix are often a little overawed when they first encounter it.  But many of the more technical users love the terminal and the things they can d that aren’t available to the uninitiated.

If you are a die-hard terminal lover, then you really need to download dterm from decimus.net. It’s very simply a context sensitive terminal window with the working directory set to your current window. It appears when you press a hotkey.

For a developer using a version control system like git, using Dterm this is a huge boost to productivity.

Handbrake and Perian

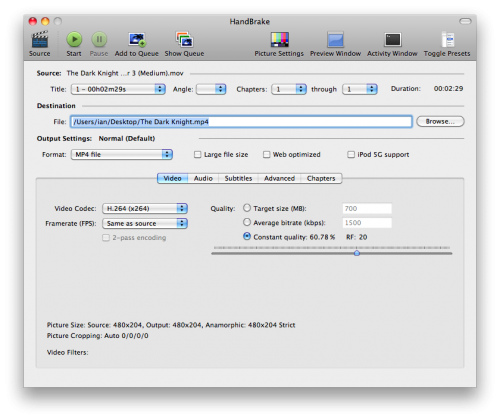
Handbrake is a great video ripping utility for the Mac. Handbrake was initially a DVD ripping tool which was always reliable but for video transcoding I relied on VisualHub. That was until the company behind VisualHub shuttered development. For a few months there was a bit of a gap in the Mac market but Handbrake stepped in and not only does it do DVD ripping but it covers video transcoding as well.

Handbrake is open-source, GPL-licencsed, multi-platform and multi-threaded. The latest update to version 0.9.4 included over 1000 updates and a 64 bit version for Snow Leopard. It includes support for presets which come with Handbrake so it’s easy to create a video for Apple TV or iPhone – the settings are automatically set making encoding very easy. You can create your own presets so if you want to repeatedly output video in a particular format you can create a preset which guarantees the sam format each and every time.

There are a massive amount of settings and options in Handbrake which can affect the final output. You can see a preview of the video as it will appear allowing you to check for any quality issues before running an encode and you can add multiple video’s to the encode queue so Handbrake can run through your queue while your away.

When downloading Handbrake you can opt to grab the command line version instead of the GUI and that becomes useful when you want to automate your ripping process. For example, this fantastic tutorial – How-To: Automate DVD & Blu-Ray (Backup, Encoding & Tagging) on the Handbrake forums takes you through the process of ripping, tagging and moving your content automatically on the Mac – something I hope to be setting up in the new year. If you have any problems the forums are definitely the first place to visit as it’s a goldmine of information.

That covers encoding but what about playback? On the Mac Quicktime is the default video player but many install VLC as it supports many more codecs than Quicktime but there is an alternative – Perian.

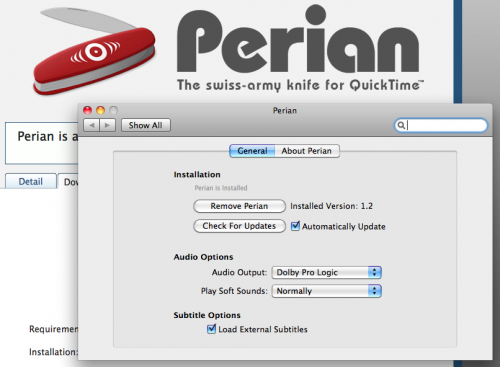
Perian is a free, open source QuickTime component that adds native support for many popular video formats. A full list of the formats can be found here. Perian is easy to install and once complete it’s settings can be accessed via a Systems Preference pane. Like Handbrake there is an active forum where you can find answers to any questions but for me it’s been trouble free. A great plugin for any Mac, especially if your using yours for media playback.

Click To Flash

Flash on the Mac is painful. Anytime I hit a website that uses flash my CPU usage takes a hit, along with my battery on the laptop. Not good. This is more obvious if it’s video content on Flash, particularly HD video. There are rumblings that Flash 10.1 will address some of the issues but I’m not holding my breath as I’ve always had issues which is frustrating when you look at how good it performs on Windows. So, what to do? For Safari users the answer is ClickToFlash.

ClickToFlash is a flash blocking plug-in for Safari with a few neat features. Firstly and most importantly it blocks Flash content allowing you to choose when you want Flash to run, not when a website wants to. To view the flash content, click on the box seen on the website with Flash inside it and the Flash content is loaded as per usual. This has the benefit of not only reducing CPU drain and increasing battery life but also making websites more readable, removing some of the in your face advertising that’s becoming more and more common. There are some websites though that you will always want Flash to run on so thankfully ClickToFlash has a whitelist which means Flash on those sites will always be loaded.

One other benefit from this plugin is on YouTube. YouTube is a Flash based video site but they have encoded many of their video’s in iPhone friendly H.264 format. ClickToFlash detects if an H.264 format is available and allows you to view that instead of Flash meaning the video is loaded in Quicktime. Happy days as the video looks and plays better.

If Firefox is more to your tastes there are a number of Flash blocking plugins available but the best I’ve found is Flashblock. This works like ClickToFlash without the added H.264 detection. These two plugins combined should give you a far better browsing experience on the Mac.

Reeder

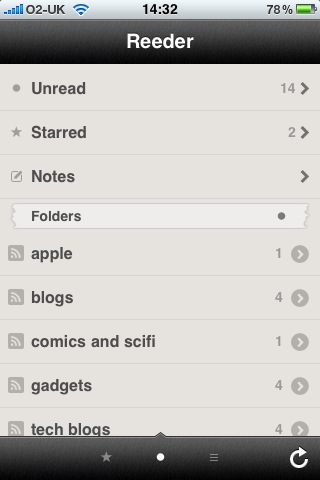
Reeder is an iPhone app built for Google Reader. Until now I’ve relied on Byline as my Google Reader client on the iPhone but I was disappointed by the sync speed on Byline. it could take ages to sync feeds which was pretty frustrating. I tried Reeder as the sync speeds were allegedly a lot better than Byline – I wasn’t disappointed.

When you first start Reeder you enter your Google Account details and it then sync’s with your Google Reader account syncing unread items, starred items and your notes. If you have a lot of starred items or notes this first sync can take a while although you can change the amount of itms synced via Reeder’s preferences if you think this could cause problems. On first launch i could immediately see that Reeder was far faster than Byline at syncing feeds.

Another improvement with Reeder is how good the app looks. I much prefer reading articles in Reeder than in Byline. The buttons at the bottom allow quick sorting by data or feed and also viewing unread and starred articles. There is also support for a number of third party services – Instapaper or ReadItLater, Delicious or Pinboard and you can tweet or e-mail a story from Reeder.

The latest update also includes swipe support so that you can quickly favourite or read an article. Swipe left on an article to mark/unmark as favourite and swipe right to mark as read/unread. You can also quickly mark as read a number of articles and thankfully there is a warning before doing this step in case you select by accident. In usage so far I’ve had no issues in syncing with Google Reader and the app and the website have kept in sync.

One area that Reeder is poor in is offline reading. At first I didn’t think that Reeder had an offline mode but it does – one that is pretty buggy. When offline, selecting a post takes around 20 seconds to appear. I can only assume this is a bug and it’s not intended to work this way. Another issue with offline content is that images are not cached as can be seen in the screenshot above. These two flaws mean I still have Byline installed for when I’m travelling by air.

If the next update fixes these issues (which according to the dev’s Twitter stream it will along with even faster syncing) then Reeder becomes a must have app for anyone that uses Google Reader. If you never need offline access then it’s a must buy now at only £1.79.

Hans Rosling and Gapminder

One of my favourite TED video’s is by Hans Rosling. He makes statistics interesting and his presentation style is superb. His full set of TED video’s can be found here but of more interest is GapMinder.

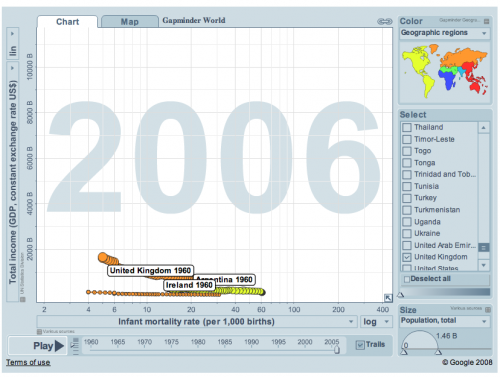
Gapminder is a non-profit organisation founded by Rosling and his daughter which developed the software used in his video’s, software which was bought by Google in 2007. The software is flash based and can be ran on the website to compare a wide array of data from 1960 to 2006. It’s fascinating and eye opening when you start to play with the data available and also look at examples that other people have done.

The Gapminder website has an informative blog and also a large number of video’s highlighting talks form Rosling and the facts behind the data that can be uncovered.

You can also make use of the Gapminder software on your own Google document. Follow this guide to setup the data and then insert a Motion Chart gadget to visualise your data. If you don’t find the software useful I urge you to at least try the video’s as you won’t fail to find them interesting.

Secrets

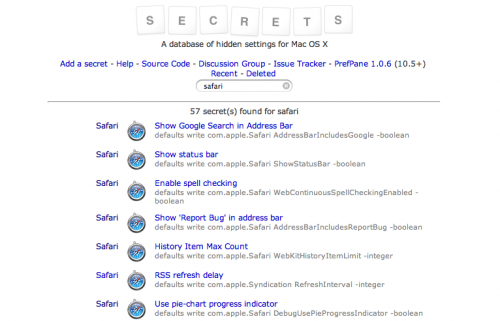
Mac OS X is a great operating system but there are many settings that aren’t exposed to the user via a GUI, instead requiring typing in a command via terminal. Secrets is a database of hidden settings for Mac OS X. The website allow you to search by application and list all known secrets for that application. It lists the command line entry you need to type which you can easily cut and paste into terminal.

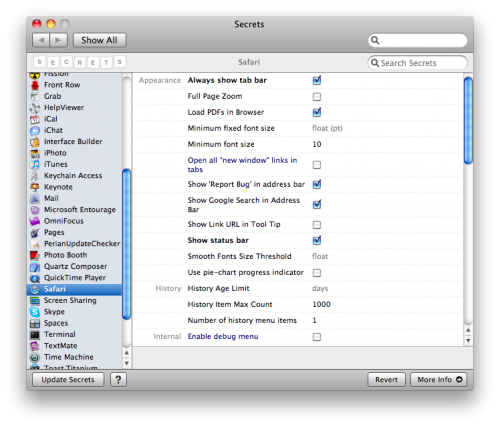
By logging in via a Google account you can edit newly added secrets or add your own. As good as the website is there is a better way of accessing secrets – via a preference pane that is downloadable via the Secrets website.

Once installed the pane can be accessed via System Preferences under Other. You can click on an Application name to view all secrets for that app. Instead of typing via the command line, options are now available via a GUI so they can be easily toggled on/off once you’ve tried them. Secrets don’t just cover the default OS X app’s. There are secrets for many app’s including Transmission, Skype, Fission and many more. From the preference pane you can also refresh the app to make sure your Secrets are up to date.

This one preference pane removes the need for a few other utilities and allows you to access a multitude of settings which were previously hidden. Highly recommended for any Mac owners.

colorschemedesigner.com

If you’re ever in a quandary over a colour scheme for a new website design, user interface or, for that matter, any design project then this is the pick for you.

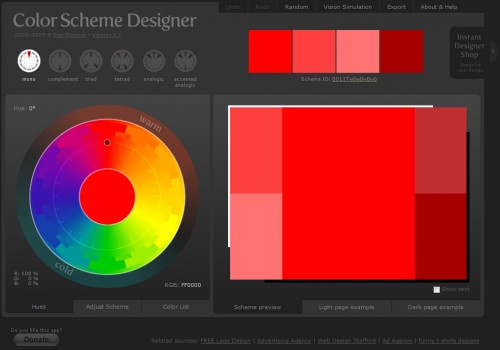
colorschemedesigner.com is a tool that enables even the most colour inept of us to generate a design palate that works.

csd1

Choose an initial colour to base the scheme around and then use the plethora of options, tweaks and visualisations to come up with a palate that works for you.

Because the colour choices are all based around sound design principles, you shouldn’t be able to go too far wrong.

csd2 csd3
csd4 csd6

Amongst the comprehensive set of options is the ability to see how your colour scheme will be seen by people with all manor of different visual impairments. This is a great accessibility check feature and should keep this important aspect of design firmly in mind.

Once you’re happy with your design, the utility also gives you plenty of export options, including HTML+CSS, XML and TXT. You also have the ability to simply show the HEX codes for use in CSS on screen.

It’s a great tool and well worthy of a bookmark.

eMotion – Mac graphics app

I did a terrible job this week of describing my pick, so I’m hoping a picture is worth a thousand words.  My pick was for a  live animation/graphics app for Macs that allows some amazing effects to be created.  Called eMotion , best results are to be had by using a graphics tablet (like Ian’s Bamboo Fun), but you can use a Wii remote or, in my case, the standard trackpad or mouse.

The app is a little buggy, and the interface isn’t very intuitive, but with a little practice you can get some quite pleasing results.  I’d have had better results I’m sure with a pen and tablet, but you’ll get a bit of an idea of what’s possible from the video below.